Customizing your operating system makes your device use more pleasurable. Microsoft’s new OS does not disappoint in this regard, as it allows users to do a ton of personalization and customization. One element you may play around with are the fonts. So, if you want to install fonts on Windows 11, this guide is for you.
We cover all the important elements; downloading Windows 11 fonts, previewing the fonts, basic font settings, and even how to uninstall them. Let us get Started.
How Do I Install Custom Fonts on Windows 11?
1. Install Fonts From the Web
Font files can be downloaded from websites and shared using CDs or flash drives, just like regular files. A quick web search will show you may download sources. We love to use Google Fonts, FontSpace, and DaFont. We use Google Fonts in the example below:
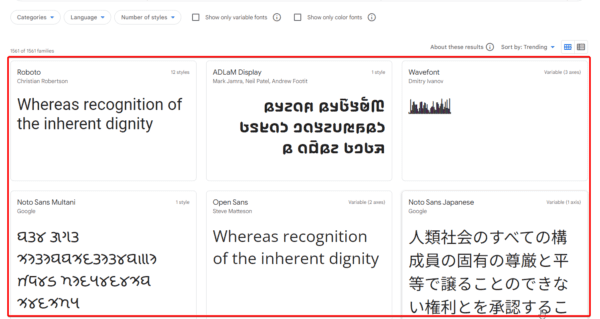
Step 1: Navigate to the Google Fonts website.
Step 2: Click on your preferred font family.
Step 3: Click Download family.
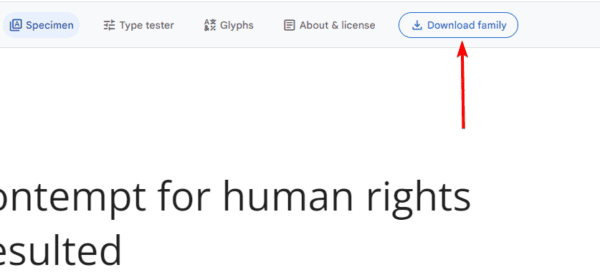
Step 4: Extract the downloaded font family.
Step 5: Navigate to the location where they are extracted to, right-click on a font, and select Install.
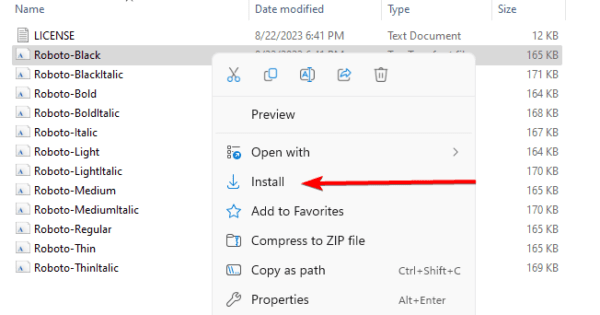
Alternatively, you may choose to install the fonts in bulk. To do this, download your desired font, extract them, and follow the steps below:
Step 1: Press Windows + E to open File Explorer.
Step 2: Navigate to the path below:
C:\Windows\Fonts
Step 3: Drag all your desired extra fonts into this font folder, and they will be automatically installed.
Alternatively, you may bulk install them from the Settings app.
Step 1: Press Windows + I to open the Settings app.
Step 2: Click Personalization on the left pane, then Fonts on the right.
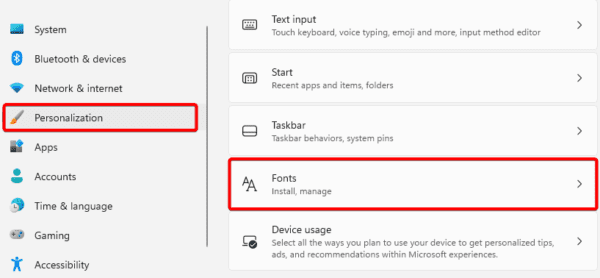
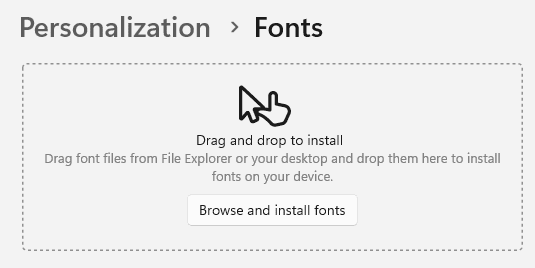
Step 3: Drag the fonts to the area that says Drag and drop to install.
2. Install Fonts From MS Store
Microsoft Store is Microsoft’s digital distribution platform. Users can download apps, as well as fonts, from the store. You may follow the steps below to get new Store fonts.
Step 1: Press Windows + I to open the Settings app.
Step 2: Click Personalization on the left pane, then Fonts on the right.

Step 3: Select Get more fonts in Microsoft Store.

Step 4: Click on your desired font, then click the Get button. The font will then be downloaded and installed on your device.

3. Downloading Fonts for All Languages
It is possible to also bulk download fonts for every language supported by Windows 11. This choice may require a significant amount of time and storage to download and could be challenging to revert. Simply follow the steps below.
Step 1: Press Windows + I to open the Settings app.
Step 2: Click Personalization on the left pane, then Fonts on the right.

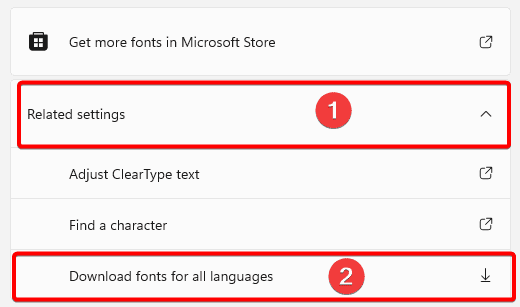
Step 3: Expand Related settings and click Download fonts for all languages, then click OK.
How to Preview Fonts on Windows 11
Previewing a font may be important to know the style, size, and weight. You may want to preview them before applying or using them on the OS. Here are the steps to use:
Step 1: Press Windows + I to open the Settings app.
Step 2: Click Personalization on the left pane, then Fonts on the right.

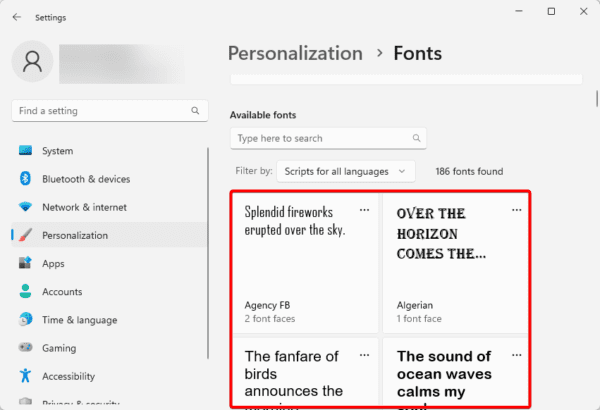
Step 3: Scroll down to the Available fonts section, then click on the font you want to preview.
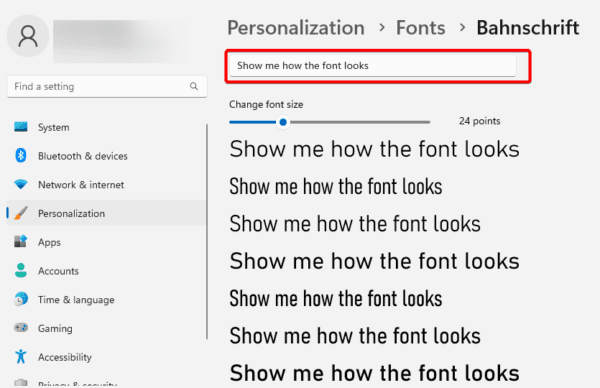
Step 4: Type in some text in the text field to see samples of the font in different formats.
Step 5: You may scroll down to the metadata section to see some other vital font information.

How to Delete Windows 11 Fonts
If you download and install so many Windows 11 fonts, they may make your computer run a bit slower. The solution is to delete them, and you may do so using the steps below.
Remove Individual Fonts
Step 1: Press Windows + I to open the Settings app.
Step 2: Click Personalization on the left pane, then Fonts on the right.

Step 3: Scroll down to the Available fonts section, click on the font’s ellipses, and select Uninstall.

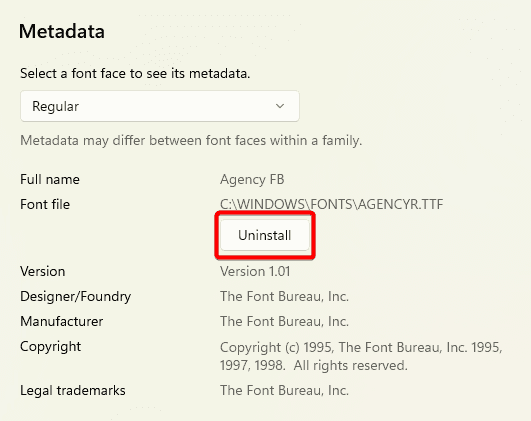
Step 4: Alternatively, you may click on the font you need to remove, scroll down to the metadata area and click Uninstall.
Bulk Remove Fonts
Step 1: Press Windows + E to open File Explorer.
Step 2: Navigate to the path below:
C:\Windows\Fonts
Step 3: Select all the fonts you do not need. You may do this by Pressing down Ctrl, while clicking on the fonts.
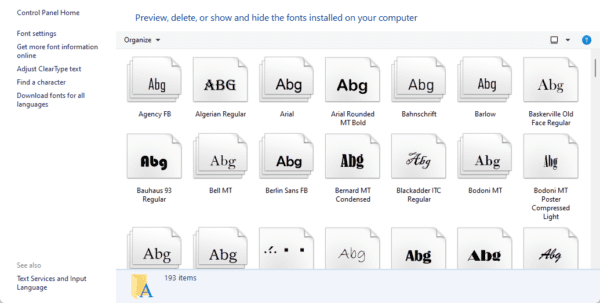
Step 4: Press Shift + Del to remove them.
FAQ on Installing and Managing Windows 11 Fonts
1. How do I install new Fonts in Windows 11?
The easiest way is to drag them into the font folder after they are downloaded and extracted.
2. How do I manage Windows Fonts?
You can manage fonts via the Windows settings, under the personalization menu.
3. Where is the Fonts folder in Windows 11?
The font folder is stored in the C drive in the path below:
C:\Windows\Fonts
Wrap up On Windows 11 Fonts
In conclusion, let us emphasize that even though there are multiple external sources to download Windows 11 fonts, you should stick to the sources you know. Malware may be introduced to your computer when you visit unknown sources and you should always use a reliable antivirus.
Lastly, please let us know in the comment section your favorite Windows 11 fonts.

